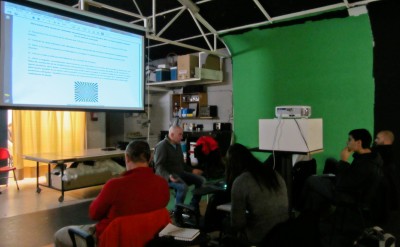
Last week began the DIT Course, organized by 709 MediaRoom in collaboration with Rafa Roche and his Roche HD training project.
The complete course consists of 80 hours, divided into 10 days of 8 hours each. It is divided into four modules divided by the syllabus, and depending on their needs, attendees have the option of taking all of them or choosing them individually.
The first module, on the general theory of video and digital cameras, was taught during the first day by Rafa Roche, a cinematographer specializing in digital cinema and s3D with over 20 years of experience in the sector.
During this day we explain a series of theoretical concepts necessary to consolidate a base that many times we do not know or do not remember and are more than necessary when working with digital cameras.
For this, installed in the Elf Set (where the rest of the week we did tests with several cameras), Rafa Roche was explaining the syllabus accompanied by files that exemplified or completed it. As always in 709 Media Room courses, this documentation is provided to students so that we can resort to it at any time of doubt.
Since all the attendees had chosen the full course, Rafa decided to slightly modify the agenda to make it more linear and logical (“let’s follow the path of light” he said in this first class). Since this is a DIT course, the first thing that was discussed was the difference between a DIT (Digital Imaging Technician), an HD technician and a data ranger, although the course teaches how to perform the tasks of all of them.
One of the topics that were discussed the most during this day were the lenses, with their different classifications. Starting with the 2/3″, PL, C, B4 or Micro 4/3 mount lenses and taking the opportunity to explain what collimation is and how to adjust the Back Focus depending on the camera we are working with.
We also discussed the distinction between “hard” or “soft” lenses; anamorphic lenses and their conversion factor depending on the sensor (whether it is 4:3 or 16:9); and, of course, the characteristics of the different models such as Cooke, Alura, Leica, etc.
After the lenses, it was the turn of the types of sensors, with concepts such as dichroic block, CCD or CMOS. About the dichroic block, Rafa told us how it works, how light passes through it and we linked this topic with filters (color correction, neutral (ND), infrared to solve YR contamination, low pass filter, etc.). The use of these filters at certain times can solve some problems with digital cameras, or serve as a support for the exposure or look of the image.
Then, as could not be missing in this theoretical class, the differences between a camera that has 3 sensors or a single one appeared; as well as the differences between CCD or CMOS sensors. Rafa explained the operation of CCD and CMOS, how the charge transfer is done in each of them.
Nor could we leave aside other terms such as resolution, discussing the use of resolutions higher than 4K and Nyquist’s theorem; the difference between interlaced, progressive or PsF, which although it seems incredible, many people who have been working with cameras for years are not clear about it; sampling (4:2:2:2 or 4:4:4:4); color depth; or compression. All of them lead us to clarify the doubts between DSP cameras (that process the signal), or those that record in RAW, a topic that will continue during the following days and we will put into practice with digital cameras.
To finish with this theoretical class, Rafa talked about the difference between mechanical and electronic shutter, and some tips to avoid dragging in the image; dynamic range; and the types of connections available today, such as HD-SDI, Dual Link or 3G SL, which we must take into account when configuring the camera outputs.
I think one of the greatest virtues of this module is that, despite being theoretical, it not only focuses on theory, but Rafa constantly gives examples of how to put all these concepts into practice. An example of this is when he talked to us about the shutter, what effect is achieved if I raise or lower the shutter speed a lot and how I could use it in an aesthetic way.
Later you can learn more about the rest of the modules, in which we work with cameras, color correction and a DIT Station. In case you are interested in future calls for this course, here is the link with all the information.


